This year is flying past so quickly, I can't believe how little I've blogged! And I don't even have a particularly good excuse for not doing so either. What HAVE I been doing? I must have just been existing really...
Well, I want to put that straight RIGHT NOW! So I'm going to share with you all something from my childhood...
They like their embroidered tops, don't they?
One of my elder sisters used to collect a part-work magazine called "The Golden Hands Encyclopedia of Crafts", published by Marshall Cavendish, in 1975. I was only two years old at the time, but my sister was about 15. I don't think she collected the whole set of 98 issues, but it was near enough. The magazines lived in a cardboard box, and when she had done with them, I "appropriated" them for myself.
Embroidered dress
I LOVED those magazines! They were full of such wonders as macrame, pottery, enamelling, basketry, needlepoint, crochet, making stuff with old tin cans, paint effects like stencilling, embroidery, woodwork, beadwork, weaving, glasswork... the list just goes on and on... you name it, most crafts were probably covered. Although I only attempted a couple of projects (most of it was outside of my capability and level of confidence at the time), I read and re-read these magazines from cover to cover, many many times. And pored over the pictures for literally hours and hours.
They don't make dresses like that anymore... cute embroidery though!
Oh! The pictures! To me, they are the very essence of the 70s... a mixture of really good design, and terrible fashion sense! Or was it really good fashion sense?
Anyway, she claimed them back from me after I'd left home, so I hadn't seen them for about 20 years, until now! I think I saw someone's pictures of them on Flickr or on a blog which piqued my interest again, but I hadn't forgotten them. Then when I found a set of a few on eBay, from a UK seller, I just had to bid for them! And they arrived yesterday! Hurrah!
Don't look so fed-up love... the embroidery is pretty, but the puffy sleeves... well, they're something else! :D
So looking at them now, they just bring back so many happy memories. To me, they are far more than the sum of their parts. Unfortunately I only have the first 16 (it was sold as issues 1 - 17, but issue three is missing...booo!), but I hope to obtain them ALL at some point...
Do you think her hair is meant to look like those ice-cream embroideries? Aw bless...
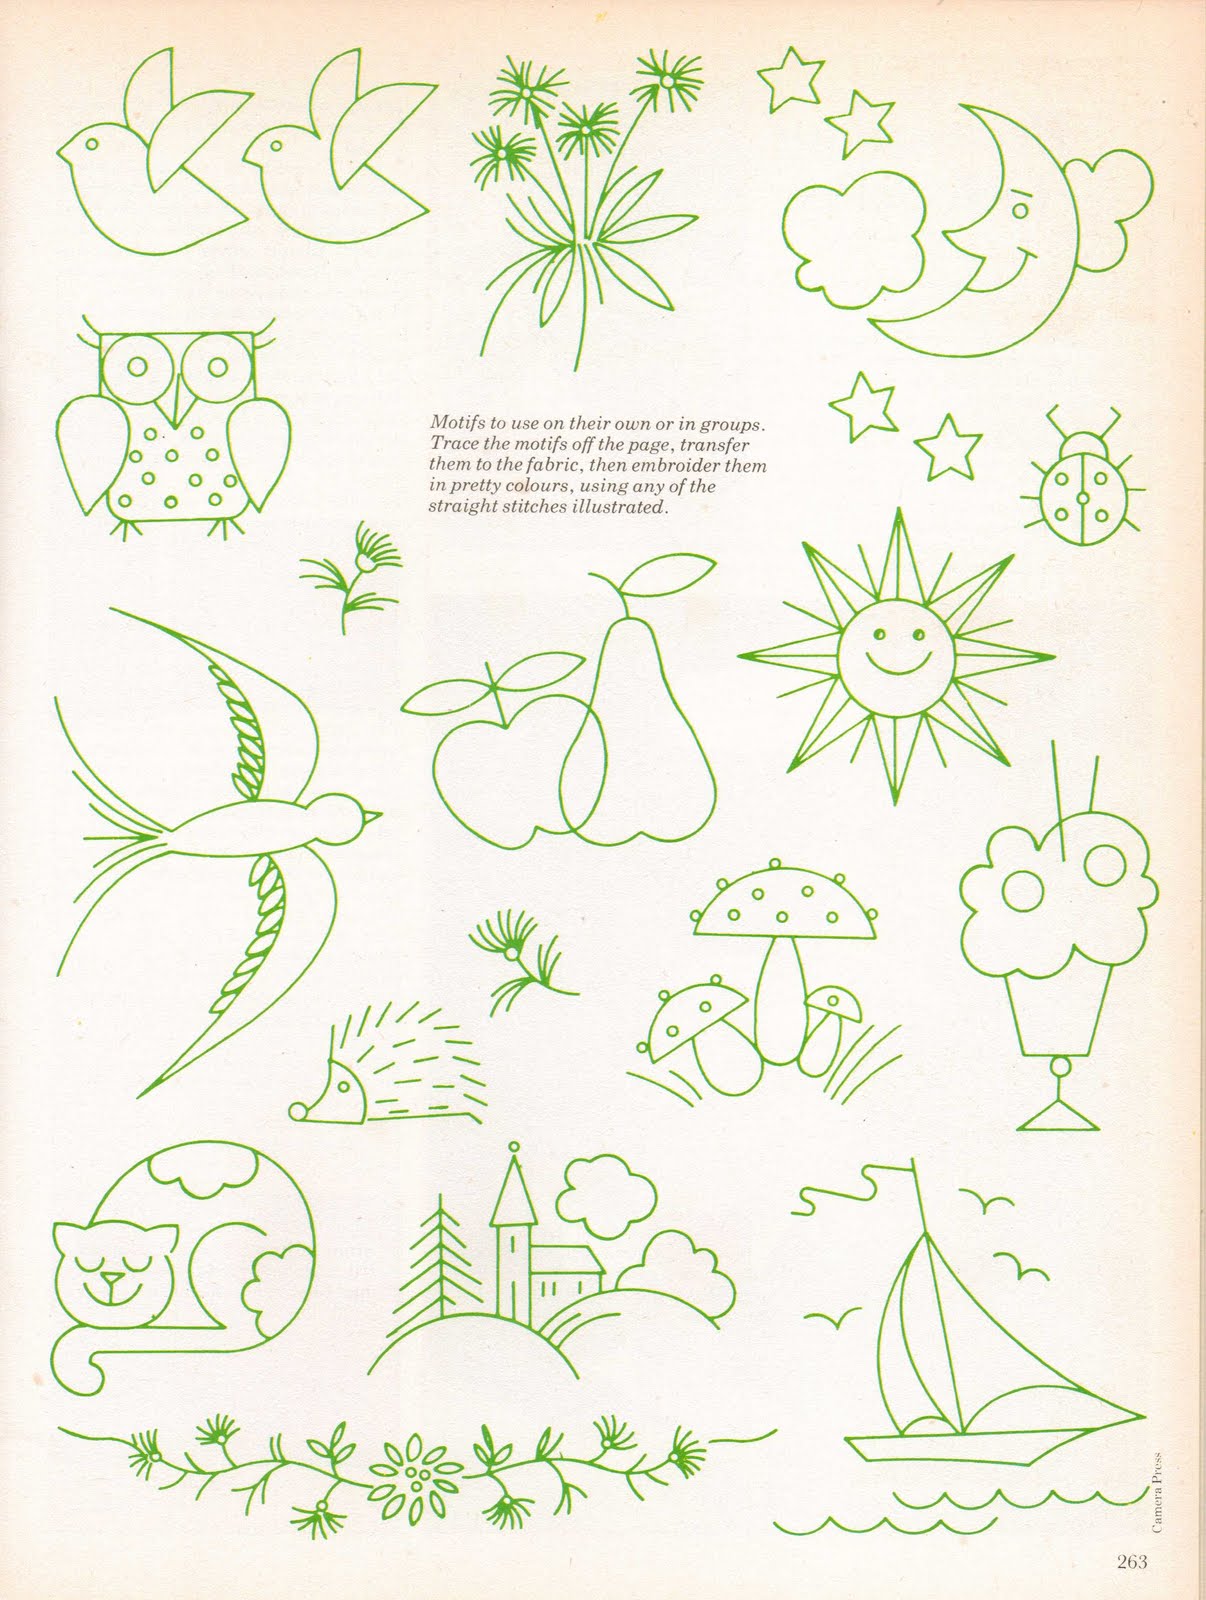
To start us off then, I'm going to share with you this collection of embroidery designs. Aren't they cute? These pictures and the embroidery designs are all from part 10. Just click on the picture below to get the full-size image.
The embroidery designs - click to bring up the full-size version
I'm going to post other snippets from the magazines too, because I think they deserve to be aired after all these years in hiding! So watch this space if your appetite for some "retro crafting" has been whetted!
Hello! I hope you've all had a fantastic Christmas!
Well I had a brilliant Christmas Day, although I always find the days after Boxing Day a bit of a comedown after all the eating, drinking and merry-making in general and now I lack the energy to do anything other than sit on my bum watching films... Hence no blogging, sewing or photography. Anyway, it's a New Year very soon, and I'm going to try to bring you loads of patterns, tutorials and general bloggy goodness never seen before on Joey's Dream Garden blog! Hurrah!
So, to start off, let's have that Angel Bunny tutorial I've been promising you! I know it's a bit late - I'm sorry about that - but I do hope you have a go at making her. It does mean that you have a whole year to make her for next Christmas! How's that for forward planning? ;-) If you don't want to sew an Angel Bunny but still want one - don't despair, as I've included some alternatives at the end of the tutorial - just scroll to the bottom.
Felt in pale pink, white, yellow or gold, and pale blue
Iron-on medium weight Vilene interfacing
Milk bottle plastic or similar plastic which you can easily cut with scissors - *see below about milk bottle plastic.
Embroidery thread in metallic silver, metallic gold, deep pink, blue, black, white and pink to match pink felt
Gold-lined glass seed beads (I used approx 110 beads)
Pins
Embroidery and hand-sewing needles (including a needle small enough to pass through holes in seed beads but big enough to take the gold metallic thread)
Toy stuffing (polyester or natural cotton or wool toy filling)
Baking paper or tracing paper
Ordinary pencil, (2H if you have it)
Velcro, approx. 7cm
White sewing thread
Fabric glue - UHU or similar
Glue stick - I use Power Pritt
Green ribbon or ric-rac (I used dark green velvet ric-ric), 30cm, to tie to the tree
*Note about milk bottle plastic: I get this from re-using HDPE (type 2) plastic milk bottles (it's flexible and sort of translucent white in colour). To prepare your plastic, wash the bottle out, cut off the bottom and top/handle part with scissors, leaving a strip of plastic. Flatten this with an iron on a medium setting (protected iron with a piece of baking parchment on top of and underneath the plastic). This really does take only a few seconds, so I suggest that you iron for just a couple of seconds, then check the plastic - remember, you only want it flattened a little. Please take care when doing this as the plastic will get VERY hot! Alternatives to using milk bottle plastic could be thin plastic document wallet plastic or thin card.
Steps to Make the Angel Bunny:
1. Print out the templates and patterns below and cut out.
2. Cut out Vilene roughly to the size plus a bit extra all round, of each of the wings, the halo, the body, the head and the legs - you will need two of each shape (except four wing shapes; back and front for each wing and just one paws piece).
3. Iron the Vilene pieces onto the appropriate colour felt following the instructions - about 8 secs with a dry iron.
4. Draw around the templates onto the Vilene-backed felt with a pencil and cut out.
5. Glue the head and the legs onto the back of the body piece, using very small dots of glue. Do this for both front and back. To ensure all the pieces are correctly aligned, you might want to print out another whole-bunny template and place them on top to help you position the pieces as you glue them.
6. Trace the the pattern on the wings onto baking paper, then pin and then baste the traced pattern onto the felt side of the wings. Ensure the pencil lines are uppermost, so they don't rub off onto the felt and make dirty pencil smudges.
7. Embroider the curving lines on the wings in stem stitch, on top of the tracing paper.
8. When you've done the embroidery, carefully cut and tear the baking paper away. I use a pair of tiny scissors for this, and a pair of tweezers which is handy for grasping tiny bits of paper with one hand, with your thumb on the embroidery and carefully tearing the paper away. This takes a bit of time and patience but I find it a quick and accurate method of tranferring detailed patterns for embroidering.
9. Repeat the process for the embroidering the other pieces with the following stitches:
Halo: all radiating lines in chain stitch (I drew the lines on with fade-away pen, but using baking paper would be just as effective, possibly even more so)
Eyes, nose and mouth outline: split stitch
Whiskers and ears: stem stitch
Teeth, tongue and mouth: satin stitch
Dress: back stitch
10. Glue the paws onto the front of the dress and blanket stitch around them in matching thread.
11. Trace the lines of the robe sleeves onto baking paper, baste to the front of the dress and embroider in stem stitch.
12. Cut small circles of Velcro and hand-sew the fluffy part onto the back of the bunny and the hooked part onto the front of the wings where indicated.
13. Cut a piece of Velcro 5cm long and stitch the fluffy part to the back of the bunny's head and the hooked part onto the front of the halo.
14. Trace around the appropriate templates onto your prepared milk bottle plastic (or alternative) and cut out two wings, one bunny and one halo shape.
15. Glue the plastic wing shapes sandwiched inside the wing felt pieces using the glue stick (take care to glue stick the wrong sides to the plastic, not the felt side. It's easy to mistake white felt for white Vilene so take your time to ensure you get it right.
16. Blanket-stitch all around each wing in silver embroidery thread.
17. Repeat the last step with the halo, but when you blanket-stitch around the outside (in metallic gold thread), pick up a seed bead before each stitch, then make the stitch as you would usually, to make a beaded edge.
18. Stitch the ribbon in place on the right side of the back bunny piece, at the centre of the ribbon.
19. Place the rabbit pieces wrong sides together, sandwiching the plastic piece inside but don't apply any glue. Holding all pieces together, and starting at the point where the head meets the dress, stitch around the edge in blanket stitch. When you've nearly stitched the first ear, start to stuff a bit of toy filling either side of the plastic insert, so both back and front are softly padded.
20. Continue stitching around and stuffing the bunny as you go. This will be a little tricky, but take your time to ensure the stuffing is evenly distributed because it will affect the final look of the bunny.
21. When you've finished stitching around the edge, stitch across the 'neck' in backstitch with pink thread so it's hardly visible, to shape the chin nicely. You will be stitching through the plastic insert, so you may need to wear a thimble to push the needle through.
22. Attach the halo and wings to your Angel Bunny, and she's ready to be tied to the top of your Christmas tree!
If you have any questions about making this Angel Bunny, just leave a comment and I'll attempt to answer as best as I can!
Alternatives to Sewing the Angel Bunny
If you're not really into sewing, here are a few suggestions for other ways to make the Angel Bunny:
Print out the wings, body and halo and glue onto separate pieces of card, colour them in with paints or pencil crayons, and attach the wings and halo to the back of the bunny with sticky foam pads or glue.
Print out the whole bunny and place underneath a piece of acetate. Use glass paints to trace and colour-in the bunny to make an ornament for your window.
Trace the individual pieces onto textured handmade papers or patterned fabrics and cut out, then glue onto card to make a sort of collage. Decorate with lots of glitter and sequins if you want!
I'd love to see your finished Angel Bunnies (sewn or not sewn)! If you make one that you'd like to show me, please leave me a comment below and I'll be in touch!
Hi there! I hope you're all well today and looking forward to Christmas. I spent a couple of hours last night putting up our Christmas tree - and when I say "putting up", all I mean is constructing the big artificial tree we've had for about six years now. It has around 60 individual branches that need to be 'fluffed out' and slotted into the 'trunk' ie metal pole. I was listening to a couple of very festive CDs (and chatting with Mathew, which was nice) to while away the time, Ralph Vaughan Williams' "Christmas Carols", and "Dona Nobis Pacem", and drinking port & lemonade like I did when I was a little 'un. Lovely. So now I'm just about to start loading the hundreds of baubles and ornaments onto the 6ft 6in monstrosity!
Anyway, here's Angel Bunny! Mathew said I could have taken better photos but there you go, I'm feeling slap-dash today. I still don't have a name for her so if you'd like to suggest an angelic-sounding name (or an actual angel's name) please leave a comment for my consideration! That would be really nice.
I promise I will be posting the patterns and instructions but at this rate, it might not be before Christmas! I have a lot to do, but I'll try my best! I've got masses to do before the New Year (secret squirrel, but it involves sewing... could it be another magazine project? wink wink!) so as my old mum used to say (and probably still does), no rest for the wicked!
macro photo showing the little hooks on Velcro. They're so tiny!!
Good morning!
Well, I stayed up late last night because I couldn't wait to finish Angel Bunny! And I did it! However the light I have to work under and take pictures with isn't that great (I really should make myself a lightbox for times like this, shouldn't I?) but I figured it was better than nothing until tomorrow when I'll be able to take some half-decent pics in natural light (I'm at work today - as soon as I've posted this!)
So, cut circles of Velcro for the wings and glued them on, and then sewed around for extra strength. An Angel Bunny needs secure wings remember, for all that flying around the room when we've gone to bed on Christmas Eve! ;-)
I stitched the hooked part of Velcro to the wings and the fuzzy parts to Angel Bun's shoulders, thus:
Then I cut a piece of milk bottle plastic as a sort of 'backbone/skeleton' to prevent her from flopping under the weight of the halo (remember it's a costume, a real halo being made of holy light, would weigh nothing). I started stitching in blanket stitch and inserted the plastic 'skeleton' and also stuffed her body with toy filling at the same time, so the 'skeleton' is encased within a layer of stuffing on either side. It wasn't too tricky as she's a nice size to work with but I think if she were any bigger it would be difficult; any smaller and she probably wouldn't require strengthening with plastic, so if you'd like to make one, that may be something to consider (make a mini one).
Well, here she is! I told you the picture wasn't very good, but I couldn't wait to show you! Oh, I forgot to take a picture of the back - she does have a tie of green velvet ric-rac with which to tie her to the top of the tree (I'm sure she can undo it herself if she wants, so don't worry too much!).
I will be posting the patterns and a quick tutorial on how to make your very own Angel Bunny tomorrow, so if you don't have much to do on Christmas Eve (don't tell me you haven't got everything ready?? So it's not just me then?) well, here's a project to keep you out of mischief!
Time to get the tree up tonight then! Christmas is coming!!
Hiya! I'm trying to get this Angel Bunny finished because I don't feel I can put our Christmas tree up until I have! You see, she's going to go on the top. Well, I finished her halo last night and I wanted to share some pictures with you.
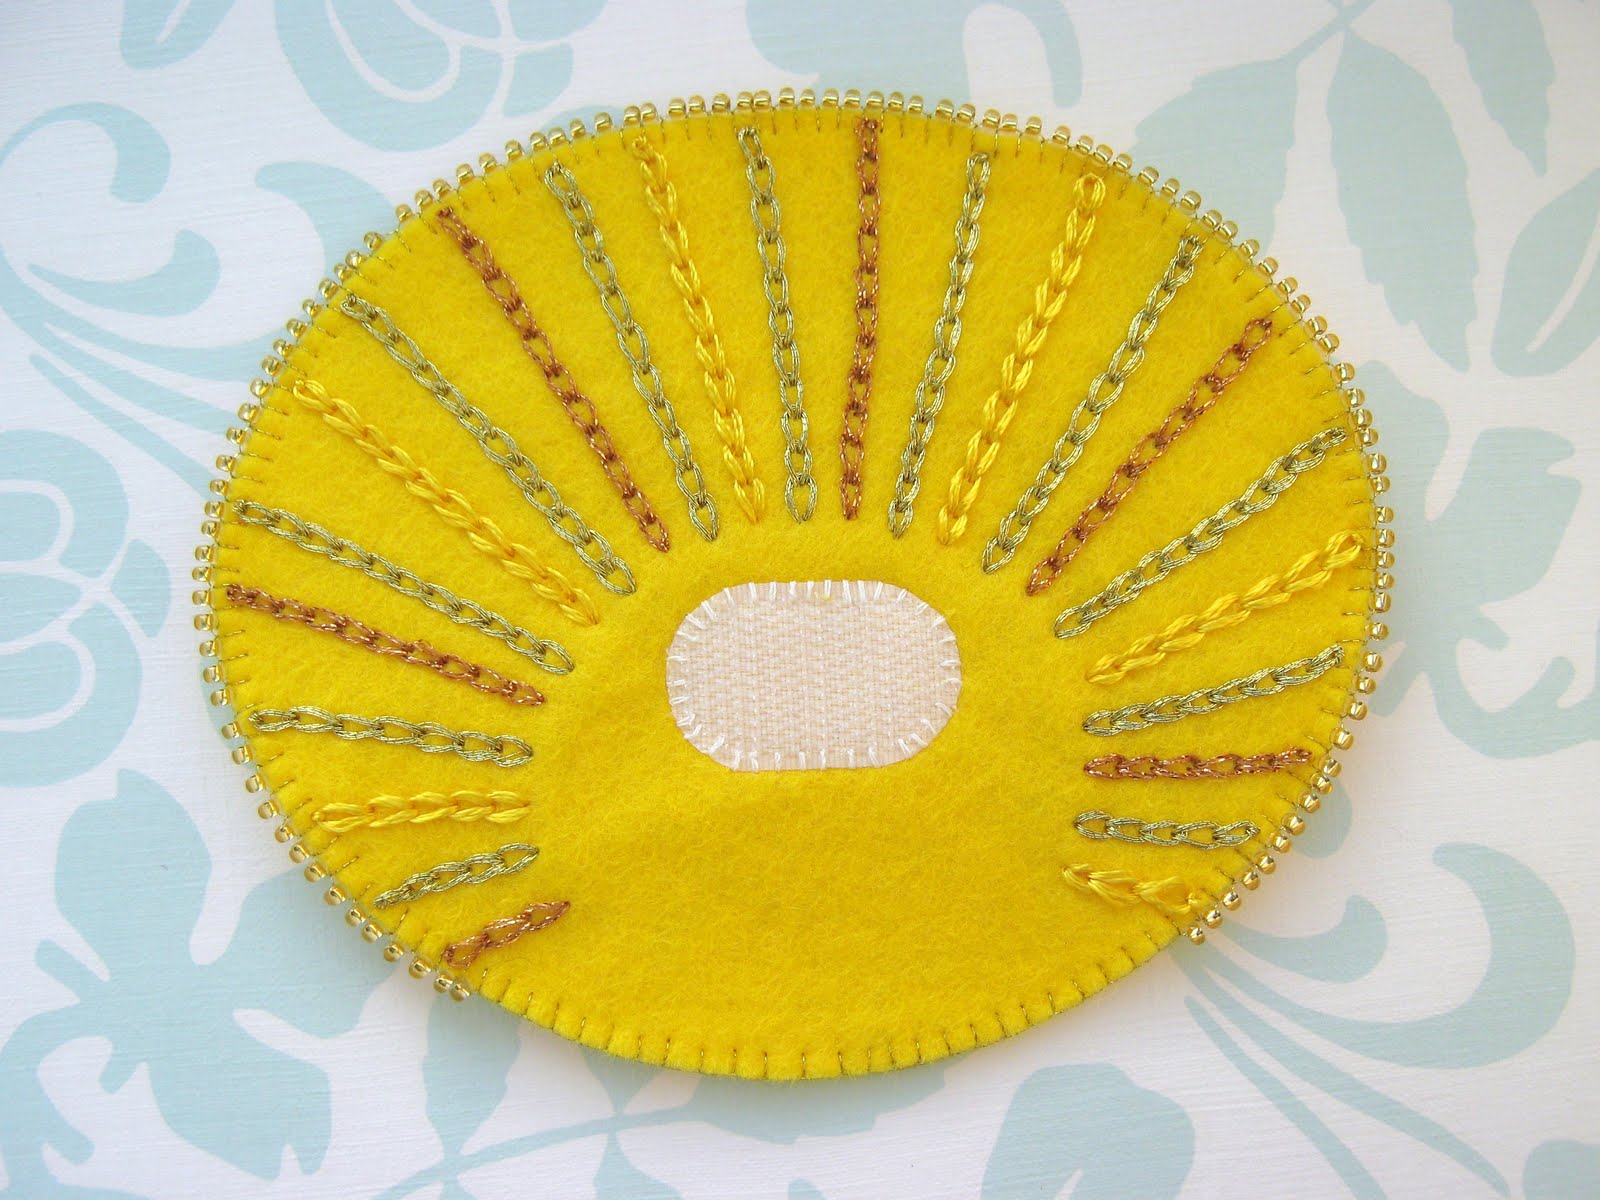
You will remember that I already cut out the felt pieces and backed them with iron-on Vilene the other day. I made a template for the 'rays' of light (lines of chain stitch) that I wanted, and used that to draw the lines straight onto the felt with fade-away pen. I think the warmer and dryer your room, the quicker this disappears, as I had to re-draw the lines a couple of times.
I used three different threads; Anchor gold lamé thread (which you have to divide as it's six-stranded), Gutermann coppery metallic thread and DMC yellow satin thread, which is super-shiny and quite 'slinky' to work with - it slips around really easily.
I've decided that it will be easier and better to Velcro the halo to the back of bunny's head, so I positioned the hooked-side of the velcro to the front of the halo and hand-stitched it on.
I wanted a bit of stiffness to the halo as well, so I cut a piece of milk bottle plastic (which I save from milk bottles to make the bigger version of the iq lampshade... look at the first one I made, nearly two years ago and still going strong!). I use this type of plastic quite frequently when I want something to be stiffened but not padded, as there's less chance of it getting bent like cardboard may do, and it has more stiffness than craft-weight interfacing (i.e. the thickest sort you can get).
I glued the felt back and front of the halo to the plastic piece then sewed around with blanket stitch, adding a gold seed bead before every stitch to make a shiny beaded edge! Which I love, I have to say!
What do you think? Fit for an Angel Bunny?
So now all I have to do is make her wings up and put her all together! Which I am going off to do right now!
Stay Warm!
(unless you are in the Southern Hemisphere, in which case, stay cool!!)
Hello!
I thought I'd share with you a bit more of the Angel Bunny I'm making at the moment...
Here's the front piece, with the embroidered 'robe' (I don't want to call it a dress, angels don't really wear dresses do they?). I used some very easy-to-sew-with silver thread called Ophir by Coats. I used backstitch. You don't need to separate the threads which is a bonus when using metallic threads, I find that really difficult. The picture doesn't capture the effect of the silver thread but it's very shiny!
Then I embroidered the sleeves of the robe in backstitch and glued on the hands (or should that be paws? Yes, Joey). I finished the paws off my stitching around them in a matching thread.
I embroidered the features in split-stitch because I find it's quite 'controllable'; you can quite easily create tiny intricate outlines and go around tight curves without any bother, though I don't think it's the most beautiful stitch. It's quite utilitarian I suppose.
I don't know about you, but I cannot make something without taking it apart and changing some part of it at least once along the process. I've been quite good at planning this piece, but I did have to change her mouth. If you look below, I hadn't outlined the whole mouth in black...
... but I decided that it might look a bit like she's sticking her tongue out! So I unpicked it all, and re-did it like this:
Which I much preferred. Lastly, I embroidered the ears to indicate the 'openings', and filled in the mouth with satin-stitch.
Here is the finished front-piece:
Next jobs will be to embroider the halo and finish the wings.
I promise that I will finish her before Christmas!!
Hi! I have a very nasty cold at the moment, and my partner Mathew has got the same thing so our house is an incubation unit for germs at the mo. I have no voice! Which I have learnt is referred to as 'laryngitis'; inflammation of the larynx. So apologies for whispering, it's the best I can do. ;-)
Do you remember that angel I made and posted a picture of a few weeks back? Well, I've decided that I want to make a BUNNY version (of course!) in FELT. I've just started but thought I would share with you how far I'm up to because I'm going to share the pattern and a tutorial for making it too! Here's the angel just to refresh your memory:
So far, I've just cut out all the felt pieces (backed with iron-on Vilene, of course). Below is the halo pieces, paws and wings.
I glued the head, body and legs together, thus (the bunny on the left shows the wrong side and how I cut the pieces, and the bunny on the right shows the right (felty) side, how the bunny will look.
These are the wings (which will be double-sided), I'm really pleased with them so far.
So please watch this space for further updates, and the pattern and instructions on how to make your own angel!
Farm animal brooches so far... nearly all the features embroidered on
Good morning!
Yesterday was wetter than a fish's wet bits, the rain poured and then poured some more. Which was actually sort of good in a way as it kept me imprisoned in my little stitching sweat shop (actually freezing until we splashed out and put the fire on in the evening! trying to be good to the environment and our gas bills) and made good progress on the lil' critters.
Embroidering the features has to be my favourite part of making brooches and stuff, because it feels like I'm giving them their character. That's just made me think, you sometimes see dolls and characters in illustration without a nose, occasionally without a mouth, but I don't think I've ever seen something without eyes. Interesting. I think somehow that would make the doll very very disturbing.
They're wonderful, aren't they? I love all of Eva Funderburgh's ceramic sculptures, she has such a compelling and imaginative menagerie of beasts that look a bit like a familiar animals, but so other-worldly that they are quite unsettling in a very satisfying way.
My friend Claire has just asked me, "Why don't you blog about the stuff you're making?" Well, the reason (or excuse) is that I'm very disorganised! I think I keep up quite a good pretence most of the time that this isn't the case, but if you saw inside our home, you'd realise that it's all just a front.
Anyway, I'll try to turn over a new leaf RIGHT NOW, and show & tell you what I've been up to over the past couple of weeks.
work in progress... a lot of blank faces!
I have a little stash of very lovely fabrics that I never seem to get around to using, and I've had in my mind for a while that I'd make some little bunny and kitty brooches with them all wearing little dresses in these lovely fabrics. I wanted to make something different and special for the Craft Candy Christmas craft fair on 27 November (which is only six weeks away - ARRGHHH! I'M NOT PREPARED! I will be though, I will be...) at which I will be having a stall, so if you're in the South Yorkshire area you must come along to get a bit of Christmas shopping in, Craft Candy fairs are always brilliant displays of beautiful handmade arts and crafts.
I've made a collection of nine (one has already flown the nest though... She's not pictured here), each with a different dress fabric, which is also on the backs (of course! Otherwise it would be rude for a prim little bunny or kitty to have a bare behind).
the back of one of the brooches, showing back of 'dress' and the brooch pin
I've embroidered the collars on by hand (it isn't lace) with cast-on buttonhole stitch (although the pink bunny in the strawberry print dress has a green woven picot collar, because it looks a bit like the calyx on a strawberry).
cast-on buttonhole collars
woven picot collar
The next thing I'll be working on will be a bag or two along the same lines as my embroidered concentric circles bags (orange one pictured below)... more news about them soon! Oh and a little secret...






.JPG)
.JPG)

